Particle Bot
The ParticleBot integrates with Particle.io to import your Core, Photon, Electron and Bluz devices.
Each of your Particle.io devices are automatically mapped to a new device in Tinamous, this allows you to record sensor measurements, receive status posts and call functions on the device. You can also monitor the device status and receive notifications when it is down.
Getting started:
- From the Bots page, Add a ParticleBot using the Add -> Add Particle Bot option from the top right drop down box.
-
When prompted enter the email and password for the Particle.io account you wish the ParticleBot to connect to.
- We use this to create a token which is used for access. You can revoke the token at any time through Particle.io.
- Your Particle.io password is not stored.
- The ParticleBot will appear in the bots list. In the background it is linking all your Particle devices to new Tinamous devices.
- If you have more than one Particle.io account you can add multiple ParticleBots, one for each account.
The Tinamous ParticleBot does not store your Particle.io password, instead an authentication token is generated from Particle.io that the bot stores and uses that to connect. The token is set to never expire, you should revoke it at Particle.io if you need to.
Particle Devices:
- When you create the ParticleBot it will look for all the devices in your Particle account and create a device in Tinamous to represent each one.
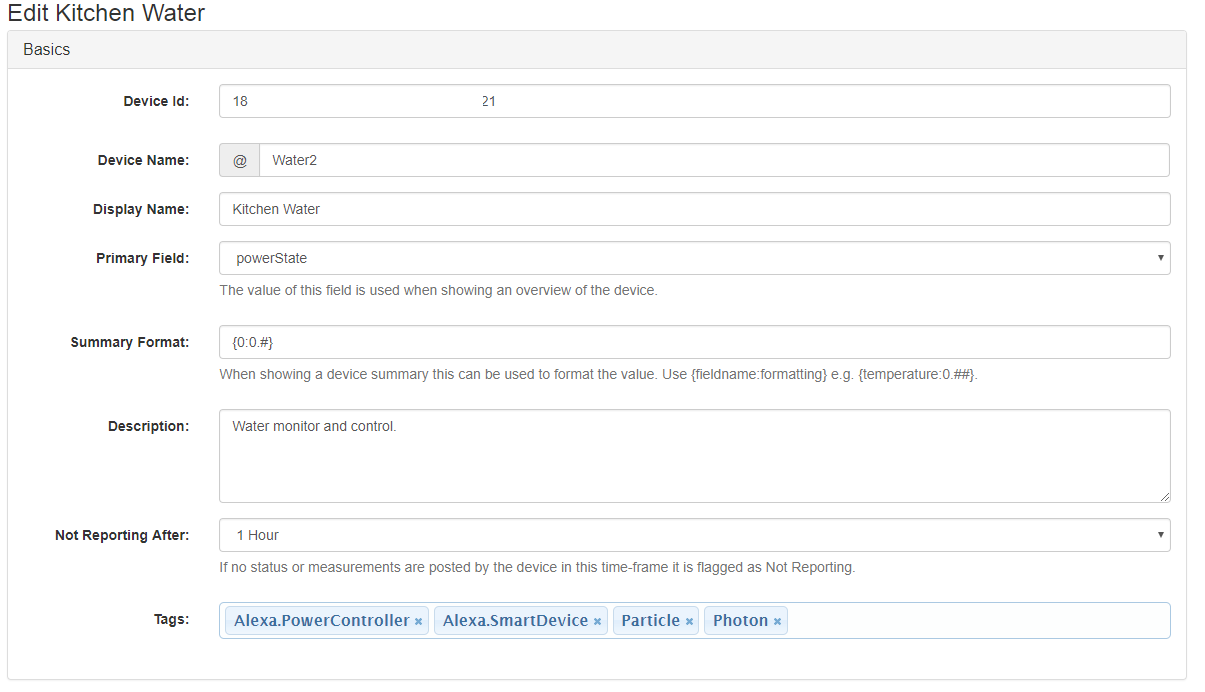
- These are given the username "@[Particle.io device name]" to match the name of the device in Particle.io (e.g. @Thermometer or @Thermometer2 if that already exists).
- They are also given a display name (what you see) to match the name of the device in Particle.io (e.g. Thermometer). You can change this as you wish.
- ParticleBot regularly looks for new devices in your Particle.io account, if new ones appear they are added as new Tinamous devices.
- ParticleBot does not remove devices for Particle devices that have been removed from Particle.io. You should do this manually if you wish.
- If you rename a device at Particle a new device is added to your Tinamous account as it is assumed the device has been re-purposed. The old device is not removed and your data is preserved.
Modify Device Details:
- From the Devices page find your device and click Edit.
- For Particle.io devices you will see extra sections "Particle Settings", "Notifications" and "Variables".
-
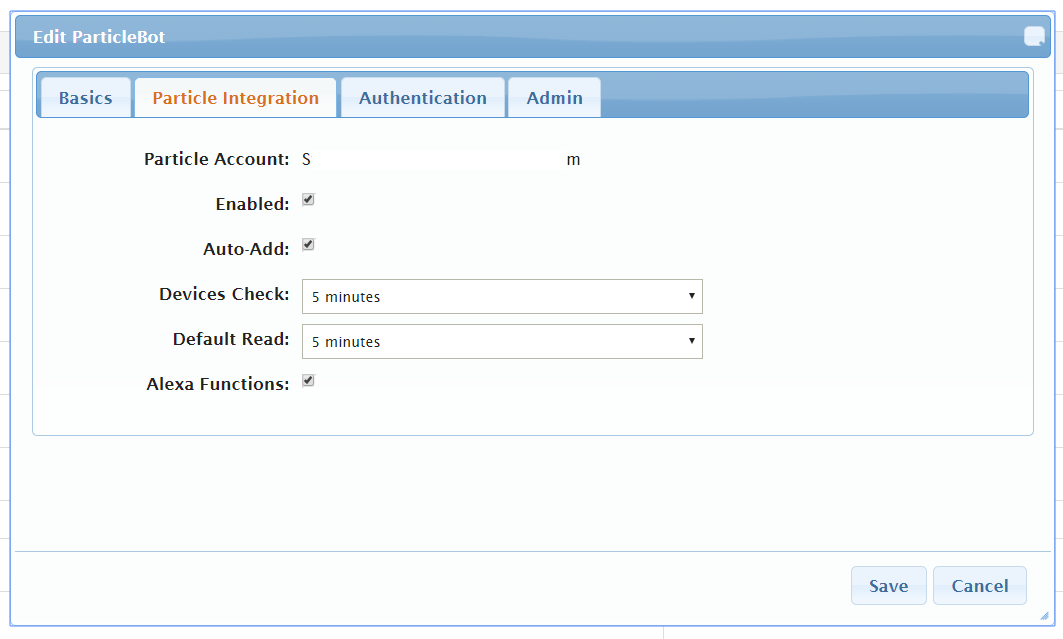
Particle Settings:
- In the Particle Settings section you can modify if the device is enabled (measurements collected) and the collection interval.
- The collection should be of the format hh:mm:ss with a minimum value of 10 seconds during debugging, normally 5+ minutes for day to day operation.
- You can also tell Tinamous to treat numeric values published as measurements and non-numeric values as status posts.
-
Variables:
- In the variables section the variables available on the device are listed along with an option to read/ignore the variables.
- The page does not show the recent measurements, only those when the read button is clicked.
- Clicking the read button will read the current value of the variables.
- A measurement is created when the variables are read. This can be seen on the devices measurements page.
-
Notifications:
- Notification options allow you to specify if the ParticleBot should indicate when the device comes online/offline with a status messagepost.
Particle Variables:
Particle Bot reads variables from your device and imports those as sensor measurement with the fields set from the variable names.
Expose variables in your Particle code in the setup() method. e.g. This exposes a cpm variable:
    void setup() {
        Particle.variable("cpm", cpm);
    }
- ParticleBot can read up-to 12 variables per Particle device.
- Each Particle device can currently expose up-to 10 variables, with a max of 12 characters for the name.
- Reading variables requires your device to be on-line and can cause the device to be busy whilst it is happening.
- Read more about Particle.variable() at the Particle.io reference page
Published Events:
Use published events from your Particle device to create status messages on your Tinamous timeline or add sensor measurements.
Use Particle.publish(eventName, data) or preferable Particle.publish(eventName, data, ttl, PRIVATE) method to publish events to Tinamous.
Using event publishing has the advantage that your device controls when data is pushed to Tinamous so you can publish data only when it has changed, or on a different frequency and as many fields as you like.
Both Particle variables and publishing can be used on the same device. You may for example wish to set a variable for battery level and publish temperature. You can set Tinamous to read the battery level hourly and publish a temperature only when it has changed, this would provide a responsive feedback for temperature without needing frequent lookups on the device and only occasional read from the device to monitor the battery level which is unlikely to change often.
Note that by default the Particle.publish() method publishes data to the public stream, use the private option to ensure it is kept private.
Particle.publish("status", "Hello World!", 60, PRIVATE);
Supported event names:
- 'status' - The data should be a string, this will appear as a status message on the Timeline. This can be very useful during device startup to publish a "Hello world I'm alive" message and include your firmware version or other information.
- 'senml', 'json', 'jsondata' or 'measurements' - use these to publish sensor measurements. See Sensor Measurements below.
- 'G', 'GPS', "LatLong" - use these event names to publish GPS coordinates for your device. See the Particle.io Asset Tracker library for an example. The data should in the decimal comma separated format (e.g. 0.612345, 52.98765)
Read more about Particle.publish() at the Particle.io reference page.
Publishing Status Messages:
Status messages appear on the Timeline and can be useful to check on the device, if it is alive, if it needs to tell you something etc. You can also send notifications based on a status message.
To publish a status message use simple string data with as status event name:
Particle.publish("Status","Geiger setup complete. V1.0.2");
The ParticleBot will watch for status events and put these events on the Timeline. You can also use non-"status" publishing by setting "Treat published events with non-numeric data as status posts." in the device Particle Settings configuration.
Publishing Sensor Measurements:
Published sensor measurements are stored and graphed on the device page. Sensor measurements can be published in a variety of formats.
Supported Event Names:
- 'senml' - Sensor measurements should be published in the SenML format.
- 'json' - When publishing use a simple json document. The data should be {name:value}.
- 'jsondata' - Same as json.
- 'measurements' - Same as json.
To publish measurements in the SenML (Sensor Markup) format:
Particle.publish("senml", "{e:[{'n':'LightLevel','v':'" + String(ambientLight) + "'},{'n':'Red','v':'" + String(redLevel) + "'},{'n':'Green','v':'" + String(greenLevel) + "'},{'n':'Blue','v':'" + String(blueLevel) + "'}]}");
which results in a document looking like:
{e:[{'n':'LightLevel','v':'22'},{'n':'Red','v':'33'},{'n':'Green','v':'44'},{'n':'Blue','v':'55'}]}
The time property of senml is not currently supported, all measurements are assumed to be real-time and the time is set to the current (utc) time on receipt of the event.
If your devices measurements are not appearing on the device chart, check the event stream on the device page for Invalid SenML messages.
To publish measurements as simple json:
Particle.publish("json", "{'LightLevel': '" + String(ambientLight) + "','Humidity': '"+ String(redLevel) + "'}");
This creates a measurement with fields LightLevel and Humidity, the formated document should look like:
{'LightLevel':'25', 'Humidity':'59'}
Simple measurement publishing: By default simple measurements are ignored, to enable them edit the Particle Bot, under "Particle Settings" enable "Treat published events with numeric data as measurements."
Particle.publish("Humidity", 53);
Tinamous tracks sensor fields automatically and will add new ones on the device when published. You don't need to do any configuration in Tinamous for your measurements to appear on the device charts. If you publish in the senml format you can also add units to the published message, these will be assigned to the field in Tinamous. For other formats you can manually set the units as you desire.
Setting the Devices Location:
Published geo-coordinates can be used to set the devices location. This can be useful if you wish to track a device or assign sensor measurements to a location (e.g. mobile pollution monitoring).
When a devices location is set, this is stored and sensor measurements published have this location assigned to them.
Please note: Due to licensing restrictions it is not possible to use the location map as an asset tracker. You can however use the Tinamous API to retreive device location history and create your own asset tracker using other mapping solutions.
Supported Event Names:
- 'G' - As used in the Particle.io Asset Tracker library example.
- 'gps' - Same as 'G' but needs two more bytes but is more human readable
- 'latlong' - Same as gps.
Example:
AssetTracker t = AssetTracker();

void setup() {
    t.begin();
    t.gpsOn();
}

void loop() {
    t.updateGPS();

    if (t.gpsFix()) {
        Particle.publish("G", t.readLatLon(), 60, PRIVATE);
    }

    // Wait 5 seconds before the next measurement/publish.
    // You would probably want a much larger time between points.
    delay(5000);
}
You will need to refresh the device page for the location map to appear for the first time, but you should then be able to see the devices location on the map.
You can also use a location within a sensor measurement. To publish measurements as json with a gps location:
Particle.publish("json", "{'LightLevel': '" + String(ambientLight) + "','Humidity': '"+ String(redLevel) + "','GPS': '"+ t.readLatLon() + "'}");
This creates a measurement with fields LightLevel, Humidity and GPS, the formated document should look like:
{'LightLevel':'25', 'Humidity':'59','GPS':'0.123454,52.98765'}
Special Variables/Fields:
Special fields in published measurements and device variables may be used to add meta-data to measurements. These inc:
-
Status is used to generate a status post on the time-line
- A status post will only be generated when the Status variable is changed from the last reading.
-
SampleId will be mapped to the measurements SampleId and not a field.
- This can be useful if you are taking measurements from a sample and want to record the sample identifier (e.g. pH measurements).
- All of the variables are read at once and create a single Tinamous measurement so this will automatically assign the SampleId to the measurement.
-
OperatorId will be mapped to the measurements OperatorId and not a field.
- This can be used to identify the operator taking the sample.
- All of the variables are read at once and create a single Tinamous measurement so this will automatically assign the SampleId to the measurement.
-
Tags is used to assign tags to the measurement.
- This may be comma, semi-colon or space delimited text.
- All of the variables are read at once and create a single Tinamous measurement so this will automatically assign the SampleId to the measurement.
-
Battery will be mapped to the devices battery value.
- This must be a numeric field and represent the battery percentage charge remaining.
-
RfStrength will be mapped to the devices RfStrength.
- This must be a numeric field and represent the RF Strength.
- This does not have to be the Wifi RF Strength, it may be other RF signal strength if appropriate for the Particle device.
Alerts:
Currently ParticleBot does not currently support raising alerts directly. If you need an alert you can trigger one from a status message using Notifications.
Particle Functions:
Using particle.function() you can create a function that is callable via the Internet. This can then be invoked through Tinamous.
You can see the functions exposed by your Particle device on the devices page. Select the Particle section, the Functions are listed in here. You can then click the "Invoke" button to call that function with the parameters specified.
Functions can also be invoked automatically via Notifications. For example if a Status Post with the message "It's hot in here" is raised this can be used to trigger a Photon controlled fan to switch the fan on.
To configure a function on your device, call Particle.function(name, method) in the setup method with the function name and a reference to the function implementation. The below code exposes 2 functions "fanOn" and "fanOff". The return value of these will be shown in the Tinamous UI and can be useful to determine that the function has done what you are expecting.
// Define the function headers.
int fanOn(String command);
int fanOff(String command);

    void setup() {
        Particle.function("fanOn", fanOn);
        Particle.function("fanOff", fanOff);
    }

    // Particle Function
    int fanOn(String command)
    {
        Particle.publish("Status", "Switching fan on for 10 minutes.");
        // On for 10 mins (6 iterations per min)
        setFan(10 * 6);
        return 10*6;
    }

    // Particle Method
    int fanOff(String command)
    {
        Particle.publish("Status", "Switching fan off.");

        // On for 0 iterations
        setFan(0);
        return 0;
    }
Read more about Particle.function() at the Particle.io reference page.
Alexa SmartHome Support:
Add Alexa SmartHome functionality to your devices with only a few lines of code on your Particle Device using the Tinamous SmartHome Alexa Skill.
e.g. "Alexa, Turn On Photon One"
To support Alexa SmartHome directives you need to add a little code to your device and apply some tags to the device in Tinamous.
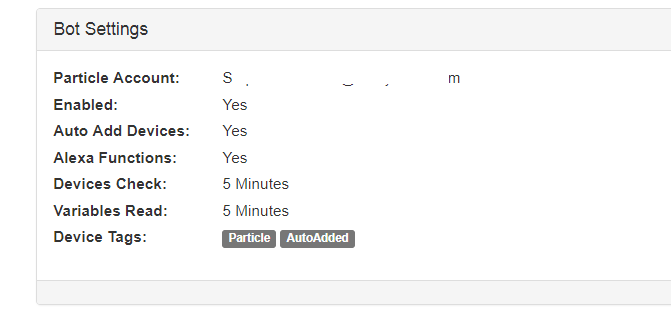
- Edit the Particle Bot and check the "Alexa Functions" option. This defaults to unchecked.
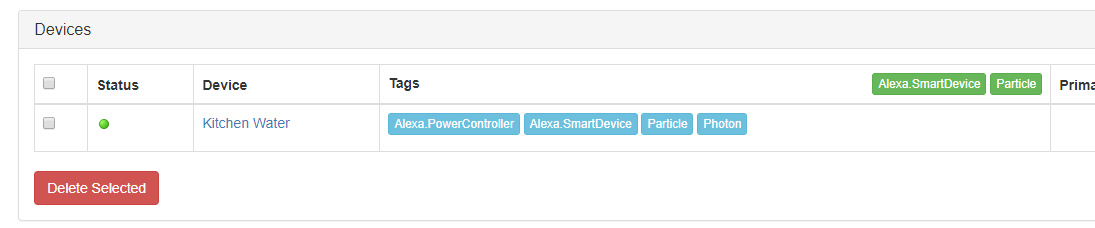
- Add a Alexa.SmartDevice tag to each device you wish for the Alexa to see
- Add the appriate directive tag to the device for the directives to support (e.g. Alexa.PowerController)
- Expose the appropriate Particle.variable, or use Particle.publish with the value (i.e. it must be a device field)
- Return values from the function are ignored.
- Check the function name carefully as it may be abreviated
- Optionally apply the required property name (i.e. "temperature") tag to an existing field (useful if it's named something else.)
- Expose the appropriate Particle.function's e.g. Particle.function("TurnOn", turnOnFunctionHandler)
If your device should be shown as multiple devices (i.e. it controls 4 oulets and you want each one to be a device in alexa)
- Add the MultiPort tag to the device.
-
Add the following State Variables (Use Edit Device from the Devices page)
- Name="PortCount", Value=The number of ports (i.e. 4)
- Name="Port-1", Value=Name of the first port
- Repeat: Name="Port-n", Value=Name of the nth port
- Unnamed ports are ignored
- Tag (or name) fields with the property name required, then "-port-n" (e.g. brightness-port-2)
- If the sub-device field is not found the skill will look for a non-port specific one (e.g. brightness-port-2, then brightness are used.)
The skill is currently only available in the UK Skill Store, but coming to more stores soon. If you want to adapt or improve the skill the full sorce is available in the Tinamous GitHub Repository.
Skill Store:
Alexa Directives:
Alexa.TemperatureSensor
// Currently only °C is supported.
float temperature = 12.3f;
void setup() {
    Particle.variable("temperature", temperature);
    // Or use publish to push the temperature value out
    // Particle.publish("json", "{'temperature': " + String(temperature) + "}");
}
Temperature is readonly, no functions are needed.
Alexa.PercentageController
NB: If Alexa.BrightnessController is also implmented Alexa will send a brightness command not percentage.
int percentage;  // 0..100
void setup() {
    Particle.variable("percentage", percentage);
    // or publish the value as and when needed.
    // Particle.publish("json", "{'percentage': " + String(percentage) + "}");

    Particle.function("SetPercent", setPercentage);
    Particle.function("AdjPercent", adjustPercentage);
}

int setPercentage(String args) {
    // args will be "90" or "90 port-1", "90 port-2", etc.
    percentage = args.toInt();
    return percentage;
}

int adjustPercentage(String args) {
    // args will be "10" or "10 port-1", "10 port-2", etc.
    percentage += args.toInt();
    return percentage;
}
Example Status Posts Alexa will post:- Status Posts: "@Photon1 Set percentage 90"
- Status Posts: "@Photon1 Set percentage 90 port-1"
- Status Posts: "@Photon1 Adjust percentage 10"
- Status Posts: "@Photon1 Adjust percentage 10 port-1"
int brightnessPercentage = 0;  // 0..100
void setup() {
    Particle.variable("brightness", brightnessPercentage);
    // or publish the value as and when needed.
    // Particle.publish("json", "{'brightness': " + String(brightnessPercentage) + "}");
    Particle.function("SetBright", setBrightness);
    Particle.function("AdjBright ", adjustBrightness );
}

int setBrightness(String args) {
    // args will be "90" or "90 port-1", "90 port-2", etc.
    brightnessPercentage = args.toInt();
    return brightnessPercentage;
}

int adjustBrightness(String args) {
    // args will be "10" or "10 port-1", "10 port-2", etc.
    brightnessPercentage += args.toInt();
    return brightnessPercentage;
}
Example Status Posts the Alexa skill will post:-
Status Posts: "@Photon1 Set brightness 90"
Status Posts: "@Photon1 Set brightness 90 port-1"
Status Posts: "@Photon1 Adjust brightness 10"
Status Posts: "@Photon1 Adjust brightness 10 port-1"
String color; // HSV/HSB Format: "240,0.5,0.1"

void setup() {
    Particle.variable("color", color);
    // or publish the value as and when needed.
    // Particle.publish("json", "{'color': '" +color + "'}");

    Particle.function("SetColor", setColor);
}

int setColor(String args) {
    // args will be "240,0.7, 0.9" or "240,0.7, 0.9 port-1", "240,0.7, 0.9 port-2", etc.
    // Maps to HSV (Hue: 0-255, Saturation: 0-1, Value/Brightness: 0-1)
    color = args;
    return 1;
}
Example Status Posts the Alexa skill will post:- Status Posts: "@Photon1 Set color HSV 240,0.5,0.1
- Status Posts: "@Photon1 Set color HSV 240,0.5,0.1 port-1
bool powerState = false;
void setup() {
    Particle.variable("powerState", powerState);
    // or publish the value as and when needed.
    // Particle.publish("json", "{'brightness': '" + String(powerState) + "'}");
    Particle.function("TurnOn", turnOn);
    Particle.function("TurnOff ", turnOff );
}

int turnOn(String args) {
    // args will either be empty, or contain "port-1", "port-2" or...
    powerState = true;
    return 1;
}

int turnOff(String args) {
    // args will either be empty, or contain "port-1", "port-2" or...
    powerState = false;
    return 0;
}
Example Status Posts the Alexa skill will post:- Status Posts: "@Photon1 Turn On"
- Status Posts: "@Photon1 Turn On port-1"
- Status Posts: "@Photon1 Turn Off"
- Status Posts: "@Photon1 Turn Of port-1"
NB: If Alexa.BrightnessController is also implmented Alexa will send a brightness command not powerlevel.
int powerLevelPercentage; // 0-100

void setup() {
    Particle.variable("powerLevel", powerLevelPercentage);
    // or publish the value as and when needed.
    // Particle.publish("json", "{'powerLevel': '" + String(powerLevel) + "'}");

    Particle.function("SetPower", setPowerLevel);
    Particle.function("AdjPower", adjustPowerLevel);

int setPowerLevel(String args) {
    // args will be "90" or "90 port-1", "90 port-2", etc.
    powerLevelPercentage = args.toInt();
    return powerLevelPercentage;
}

int adjustPowerLevel(String args) {
    // args will be "10" or "10 port-1", "10 port-2", etc.
    powerLevelPercentage += args.toInt();
    return powerLevelPercentage;
}
Example Status Posts the Alexa skill will post:- @Photon1 Set powerlevel 20
- @Photon1 Set powerlevel 20 port-1
- @Photon1 Adjust powerlevel 10
- @Photon1 Adjust powerlevel 10 port-1
Not Implemented
Alexa.SceneControllerNot Implemented
Alexa.ThermostatControllerNot Implemented
Resources:
- Particle.io: Particle.io
- Particle Docs: Photon Firmware Documentation
- Particle Docs: Electron Firmware Documentation
Sample Code:
- Publishing light levels as senml: https://gist.github.com/BookSwapSteve/e430cb1f53bbc96a4e04
- Publishing a status update: https://gist.github.com/BookSwapSteve/a9167c87af85c44eeb45
- Minimal (on/off) Alexa example
- Alexa example with on/off, temperature and brightness
Examples:
- Roll Pole. Internet connected toilet paper with a Particle Photon https://www.hackster.io/TinamousSteve/roll-pole-the-internet-of-toilet-paper-19eb81
- Low voltage lighting controller https://www.hackster.io/TinamousSteve/iot-low-voltage-lighting-controller-e7957d
- Internet connected Geiger Counter with a Photon or Electron https://www.hackster.io/TinamousSteve/internet-geiger-counter-3f1ba2